Busy 18 V1.1 with GST Introduction
Name:
Enter the name of the company to be created. You can enter a name up to 40 characters.
Print Name:
Print Name refers to the name that appears on all the printed reports for the company. By default, the name entered in the Name data field is displayed as Print Name. By default, the name entered in the Name data field is displayed as Print Name. You can leave this data field blank if you do not want any name to appear on the Print Reports.
F.Y. Beginning From:
F.Y. is an abbreviated form for Financial Year. Financial Year refers to the Accounting Period. For example, in India, the Financial Year is generally a 12 month period from April 01 to March 31. For Bharat Electronics the date is 01-04-2018.
Books Commencing From:
In this data field, you will enter the date from which you start the books of accounts. By default, the F.Y.Beginning from date is displayed as Books Commencing from date. For Neeraj Pvt. Ltd. the date is 01-04-2018.
Short Name:
Specify short name for the company in this data field. For example, if your company name is Neeraj pvt. ltd. then you can write NPL in this data field. Basically, in this data field, you can specify the abbreviation that you use for Company name.
Click on Save Button to appear Save Dialog Box as shown below:
Finally Click Yes to save this information. You will notice a congratulations message get displayed.
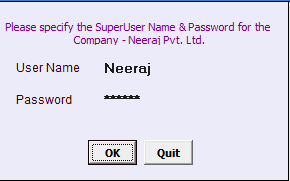
Click Ok to create the Super User for this company as shown.
Create new supper user and Password. Then click on save
SuperUser is the top most user in the hierarchy of users in BUSY. A SuperUser is like the owner of a business who has all the rights and access privileges in the business.
After creation of the SuperUser, BUSY automatically opens the Features/Options window in which you can set the features and options as required in the company. If you do not want to set features and options then click the Quit button. You can set features and check box:
Finally Click on Save button to save all these details. After that click on Exit button on Features/ Options window.
To close an active company, go to Company Menu -- Click Close option. On clicking the Close option, BUSY close the active company and returns to the main window of BUSY.
You cannot exit from BUSY until and unless the active company is closed. If you try to exit from BUSY without closing the active company, a Can't Quit message box appears asking you to close the company before quiting.
To exit from BUSY, go to Company Menu -- Click Exit option.
To open an existing company, go to Company Menu -- Click Open option, a Select Company for Operation window appears.
Select the company that you want to open and click the Select button.
On clicking the Select button, a Security Check window appears. Enter the User Name and Password to open the company. Click the OK button.
After that Busy will open your Company.
To modify any existing, at first open the company which you want to modify --Click on Company Menu -- Edit Company. Make necessary modifications as per requirements the click on Save.
To delete a company, click on Company Menu -- Delete Company. On clicking the Delete company option, a Select Company for Delete window appears that lists down all the existing companies. Select the company that you want to delete and click the Select button. On clicking the Select button, an Authority Check window appears for the SuperUser Name and Password
Go to Administration -- Master -- Account -- Click Add. On clicking the Add option, an Account Master - Add window appears. Type an account name; then select a proper group and input opening balance if required. See figure below.
Name:
Enter the name of the company to be created. You can enter a name up to 40 caracters.
Alias:
Enter an abbreviation or a short name for the account. For example, if your account is for State Bank of India then you can enter the alias as SBI.
Group:
Select the appropriate Account Group from the pop-up list of the Account Groups that appears when you enter text in the Group data field. When you create a new company, 29 Pre-defined Account Groups are created by default.
Go to Administration -- Master -- Account -- Click Add. Type a party name as Dev Traders under the group Sundry Debtors and input Rs. 60,000/- as opening balance.
Enable the option Maintain Bill by Bill Balancing. Click Save button to open Bill-by-Bill Details of Opening Balance window. Type Bill reference, Bill date and Amount. Finally click OK.
When the group selected is Fixed Assets then a Rate of Depreciation for Account: window appears containing group specific data fields. Given here is a screenshot of the Rate of Depreciation for Account window.
Modify/ Delete Account:
Go to Administration -- Master -- Account -- Click Modify. On clicking the Modify option, Select Account to Modify window appears. Select an account to Modify, Type a new account name and click save to modify.
To delete an account click Delete button or Press F8 from Account Master-Modify screen. Click Yes to confirm delete. See Figure below.
An Account Group is a broad level categorization under which similar types of accounts are grouped under one Account Group. All accounts are classified under Account Groups. In BUSY, Account Groups can be created or modified using the Accoun Group master. When you create a new company, 29 Account more masters are created by default for your convenience. Out of 29 account groups 10 are primary groups and19 are Secondary groups. The Default Account Group masters is:
Pre-defined Account Groups are classified in primarily two categories:
Primary - These Account Groups represent the top-most level in the hierarchy of Account Groups.
Secondary - These Accounts Groups are grouped under the Primary Groups. For example, Cash-in-Hand is a secondary group under the Current Assets Primary Group.
To create an account group, go to Administration -- masters -- Account Group -- Click Add.
On clicking the Add option, a Group Master - Add window appears.
Type a group name as Outstanding Expenses, select group as Current liabilities and click Save.
Go to Administration -- Masters -- Account Group -- Click Modify. On clicking the modify option, Group Master-Modify window appears. Select a group to MOdify, Types a new group name and click save to modify.
To delete a group click delete button or press F8 from Group Master-Modify screen. Click Yes to confirm delete. See figure below.
Create the following accounts with opening balance as shown below:
Press F2 to quickly save your master after giving required information. For online master creation press F3 from appropriate location.


Comments
Post a Comment